
Your First Auto Bot
This guide walks you through setting up an automated content bot that monitors an RSS news feed, filters articles by your niche, and generates unique articles — all on auto-pilot.
We'll use news.detik.com as an example RSS source and set up an AI filter to only generate articles about politics.
Step 1: Create a Project
If you haven't already, create a project for your auto bot. Go to Project in the sidebar and click New Project. Give it a name like "Politics News Bot".
Step 2: Open Auto-Pilot
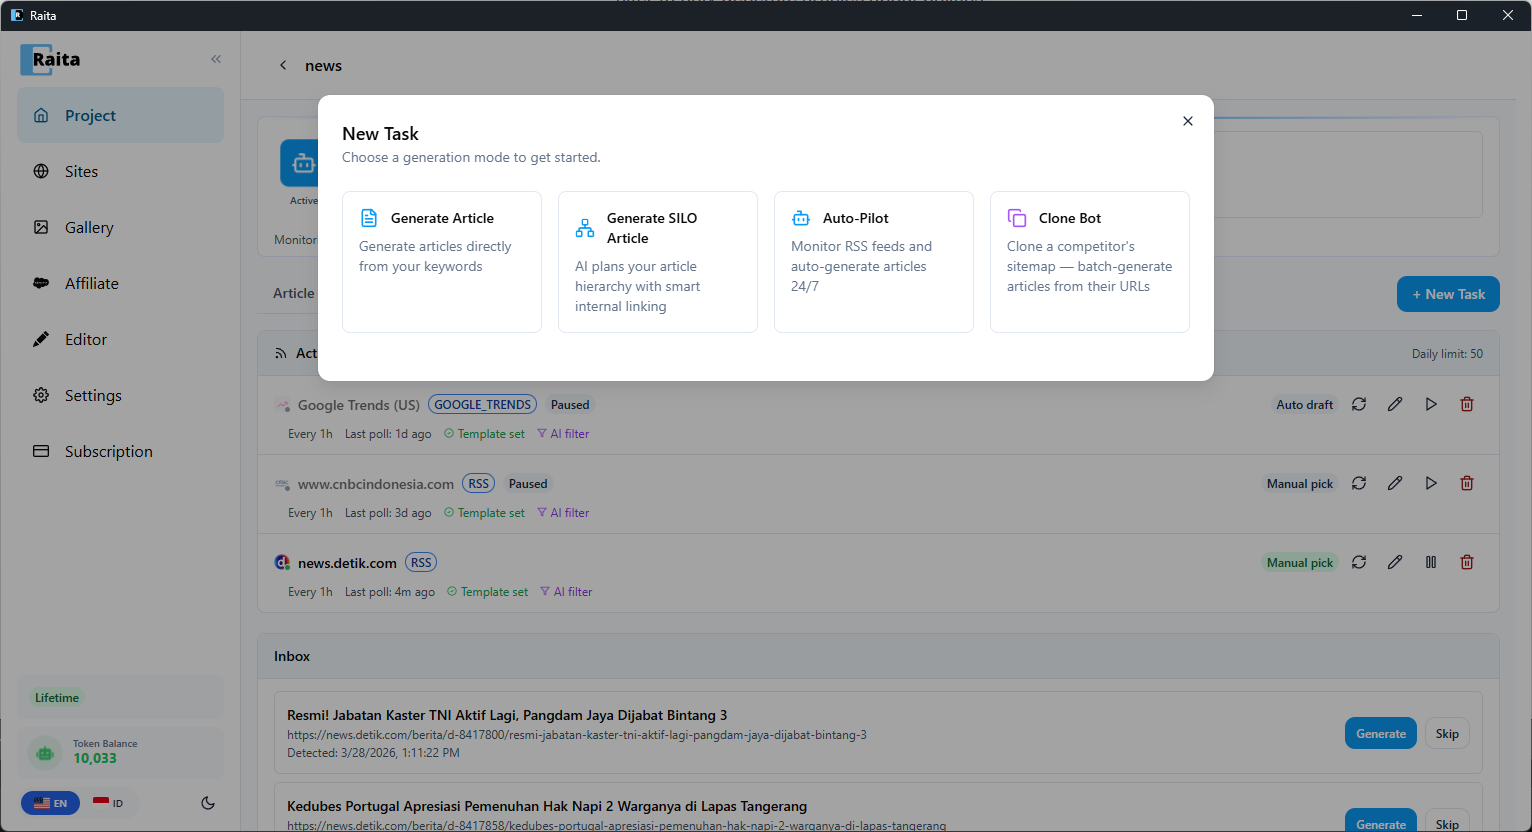
Inside your project, click + New Task to open the task picker. Select Auto-Pilot.
Step 3: Choose RSS / Sitemap Source
Under Source Type, select RSS / Sitemap.
Configure the feed:
- Feed Type — RSS / Atom
- Feed URL —
https://news.detik.com/berita/rss - Click Check to verify the feed is valid
Set the Check every interval — how often Raita polls for new articles (e.g. every 1 hour).
Step 4: Set Behavior
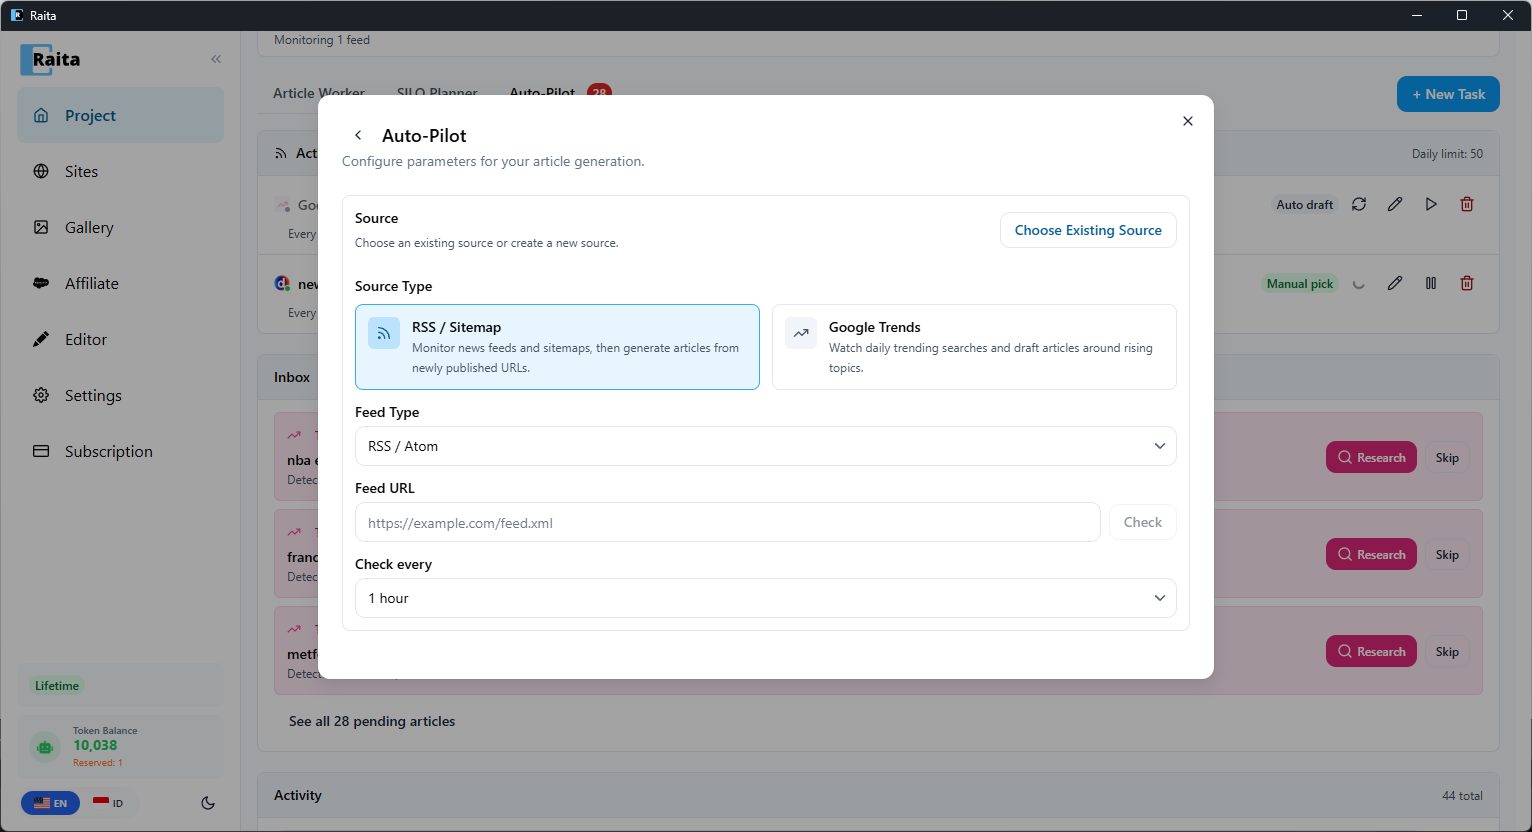
- When new content is found — choose Auto create article (draft). This lets Raita automatically generate articles from every matching feed item without manual approval — you can always review and edit them later in the Article Worker tab.
- Title & Keyword — choose how to extract the article title (e.g. "Rewrite title (slug as keyword)")
Step 5: Set AI Filter
This is where the magic happens. In the AI Filter field, enter a prompt that describes what articles to accept:
only work on politics
AI evaluates each new RSS entry against this prompt. Articles about politics will pass through; everything else (sports, entertainment, health news, etc.) gets filtered out and sent to the AI Filtered section.
Step 6: Set Daily Limit
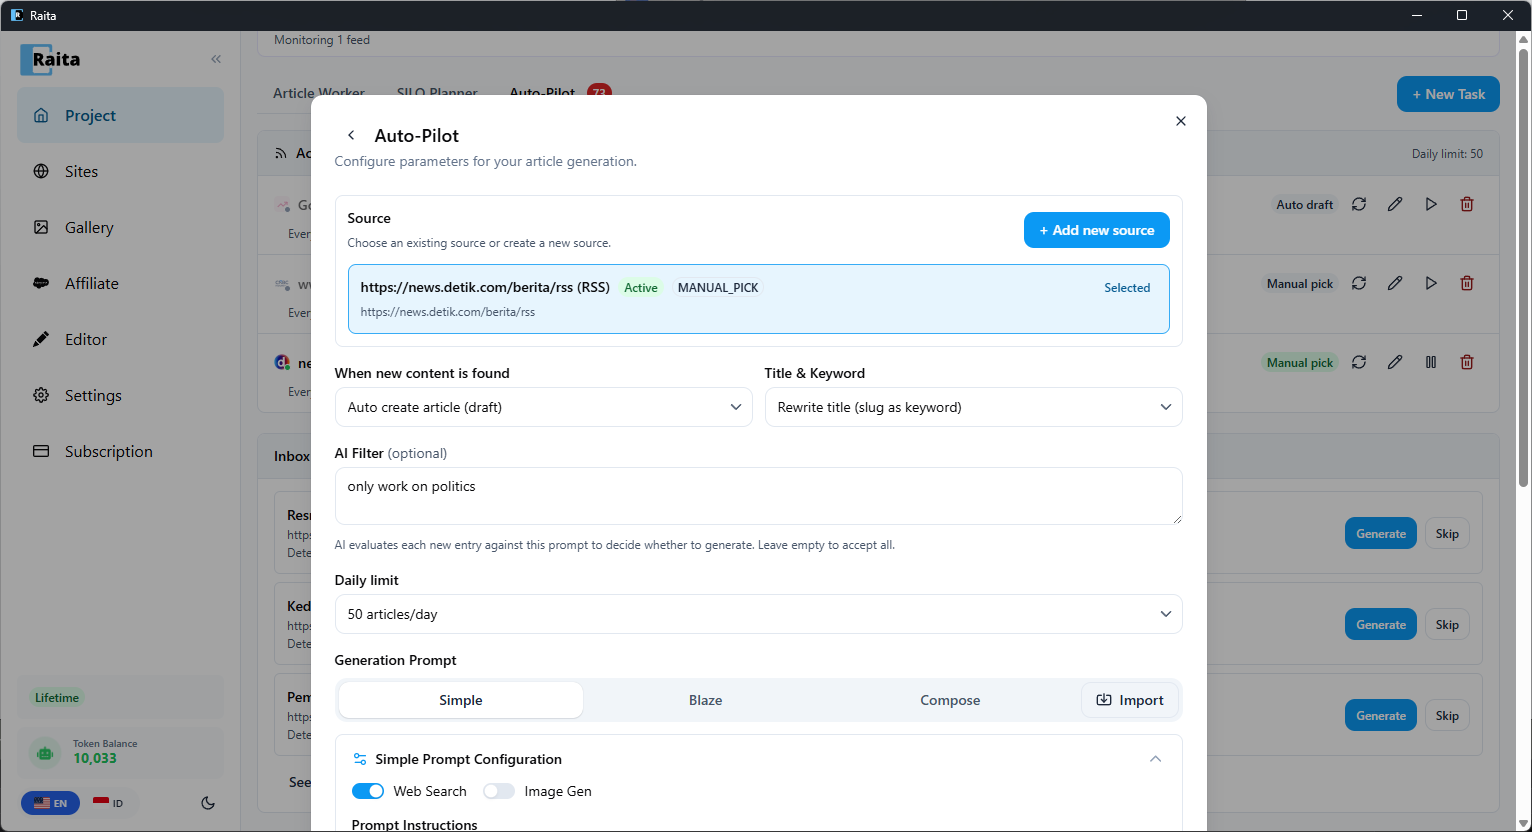
Choose a Daily limit to control how many articles are generated per day (e.g. 50 articles/day). This prevents runaway generation from high-volume feeds.
Step 7: Choose a Prompt Template
Under Generation Prompt, pick a starter template:
- Simple V4 (Recommended) — fast, single-pass generation with web search
- Blaze V4 — multi-stage for longer articles
- Compose V4 — section-based for full control
The source article's content and URL are automatically injected into the prompt, so the generated article will be based on the original news story.
Step 8: Start the Bot
Click Generate to activate your auto bot. Raita will immediately poll the feed and start processing articles.
Monitoring Your Bot
Your feed appears in the Active Feeds section of the Auto-Pilot tab. Below it you'll see:
Inbox
Articles that pass the AI filter land here (if using Manual pick). Click Generate to create an article, or Skip to dismiss.
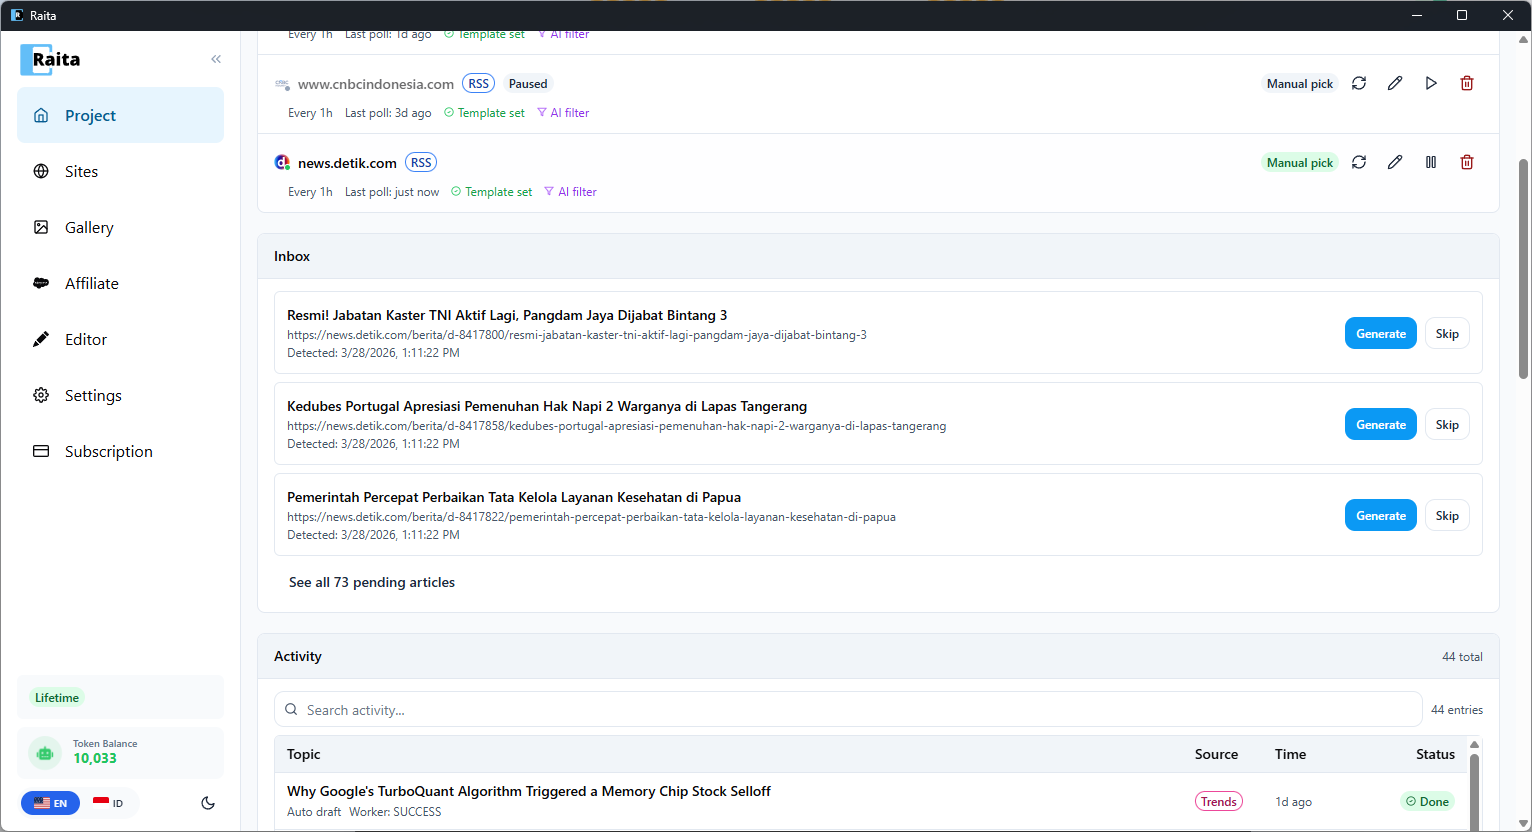
Activity Log
All generated articles appear here with their source, time, and status. They also show up in the regular Article Worker tab.
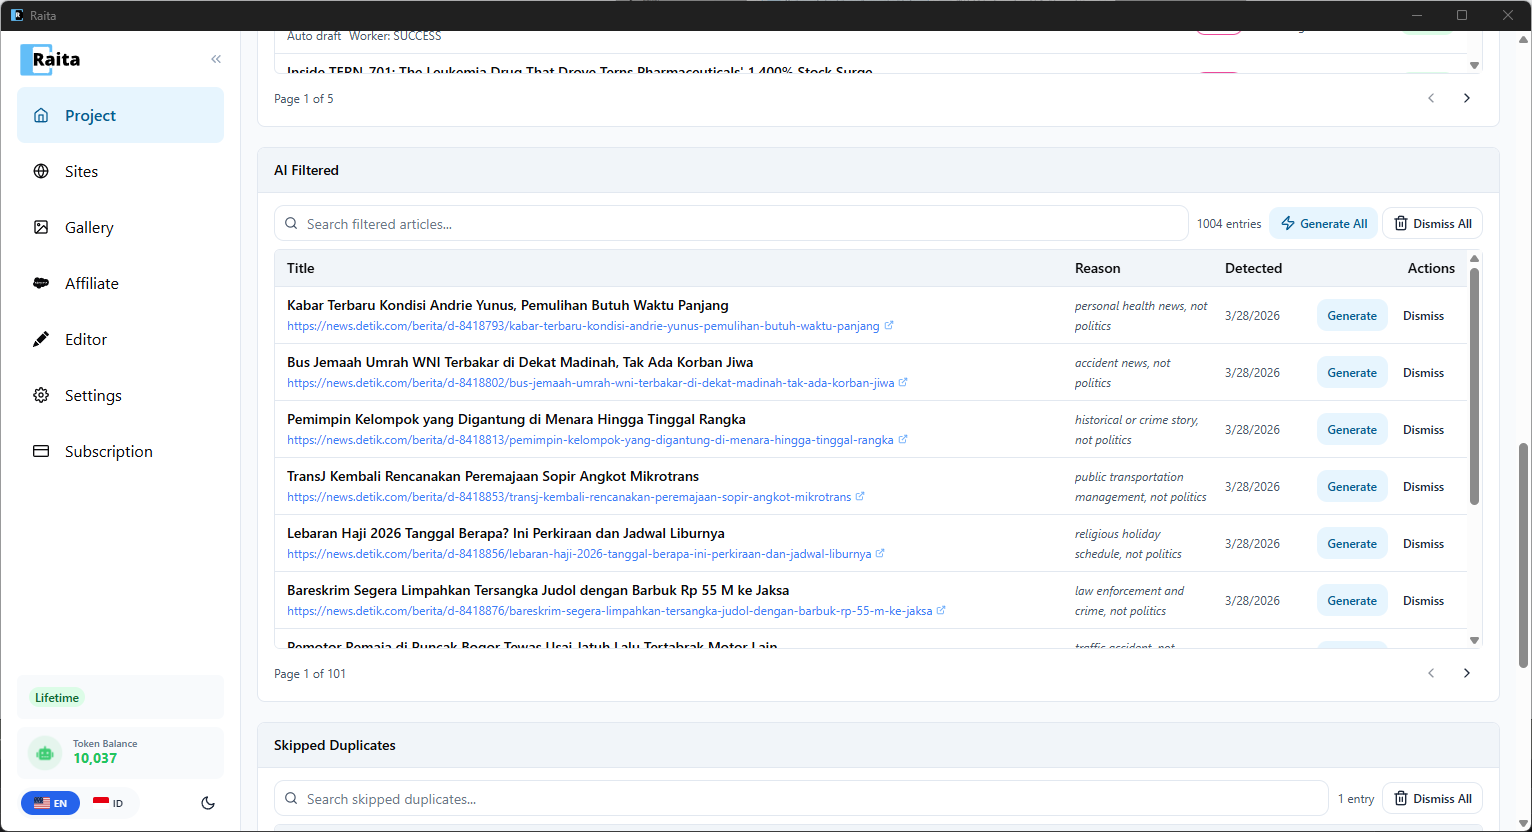
AI Filtered
Articles rejected by your filter appear here with the reason (e.g. "personal health news, not politics"). You can still click Generate to override the filter, or Dismiss to remove them.
Next Steps
- Add more RSS feeds from different news sources to diversify your content
- Set up Google Trends as an additional source for trending topic discovery
- Connect your WordPress site and switch to Auto publish to fully automate the pipeline
- Explore Clone Bot to clone a competitor's article list